| Photo Explosion makes it simple and fun to crop or
"trim" your photographs into all sorts of unique shapes! We'll show you how! |
| |
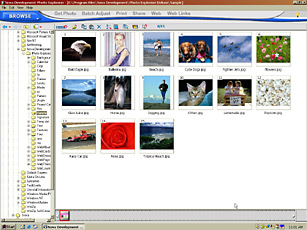
Step 1: Select Your Photo
Launch Photo Explosion and select Browse or Edit Photo on the opening screen.
Get your photo from your digital camera, scanner, video capture or choose an
image from the files in your computer by selecting the folder containing the
image and double-clicking the appropriate thumbnail. |
|
 |
| |
|
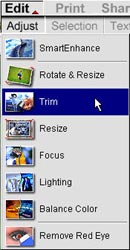
Step 2: Trim Your Photo
You are now in Photo Mode, where you can edit your photos. To trim a photo, go
to the Edit menu, select Adjust and then choose Trim.
|
|
 |
| |
|
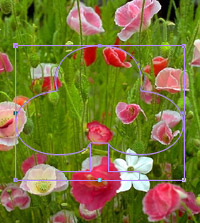
Step 3: Customize Your Trim Shape
To resize your trim shape, click and pull any of the square nodes.
|
|
 |
| |
|
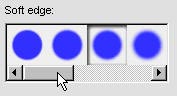
Control the sharpness of the edges of your trim shape with Soft Edge. The
leftmost option will be the sharpest definition, while the rightmost option
will be the blurriest.
|
|
 |
| |
|
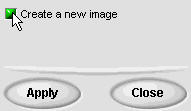
Step 4: Save Your Photo
When you are working with a photo, you're working on the original file. To
prevent overwriting the original photo, be sure to check Create a New Image.
Then click Apply. You now have a copy of the original photo with an image
trimmed in the shape of your choice!
|
|

|
| |
| Don't forget to share your photos with friends and
family by emailing or printing them! |
| |
| Return to Tutorials |
| |