| Make your gifts stand out from all the rest with
personalized gift tags! You'll need heavy weight paper, like cardstock. |
| |
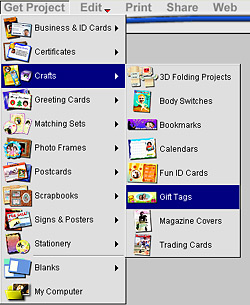
Step 1: Choosing a Project
Launch Photo Explosion and select Create Project on the opening screen. In the
Get Project menu select Crafts and choose Gift Tags.
|
|
 |
| |
|
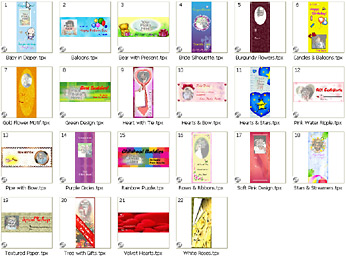
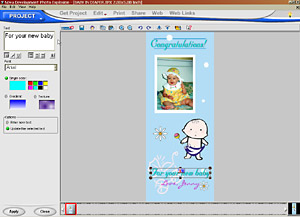
Step 2: Selecting a Template
Choose a template you like by double-clicking on it. Template themes include
birthdays, new baby, weddings, graduation, Father's Day, and occasions. Note
that you can customize any template by changing the background, text, and
photo.
|
|
 |
| |
|
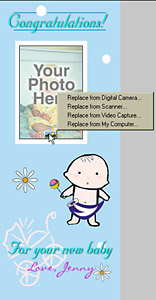
Step 3: Inserting a Photograph
The template comes with a placeholder picture. Replace it with your own image
by clicking on the placeholder to select it and then clicking on the
rectangular icon below it. Then get your image from your digital camera,
scanner, video capture or computer files. Once it's in the template, you can
move it by dragging and dropping to the desired location. To resize it, go to
the Edit menu, choose Adjust and select Rotate & Resize. Then click and
pull any of the square nodes surrounding the image.
|
|
 |
| |
|
Step 4: Customizing the Text
Double-click the template's text. The text tools will automatically appear on
the left allowing you to write your own message and change the font by choosing
a color, texture or a gradient effect. Select Apply when done. Add pizzazz to
your text with a shadow, special effects, reshaping or transformation. These
options are in the Edit menu under Text.
To move your text, simply drag and drop it in the desired
location. To resize it, click and pull any of the square nodes surrounding the
text.
|
|

|
| |
|
Step 5: Creating and Managing Multiple
Gift Tags
Follow the steps above to create additional gift tags, and be sure to save each
one in the same folder on your computer. This will come in handy when it comes
time to print.
|
|
|
| |
|
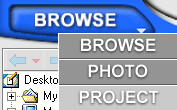
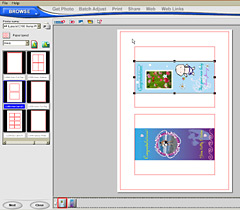
Step 6: Printing
Go to Browse mode and select the folder containing your gift tags by
double-clicking it. Select the files you wish to print by highlighting them.
Then choose Multiple in the Print menu.
|
|
 |
| |
|
On the left choose paper types and layouts. If you're printing
just a few gift tags try Avery 5388. For multiple gift tags try Avery 8373.
Click Apply when done.
|
|
 |
| |
| Return to Tutorials |
| |