|

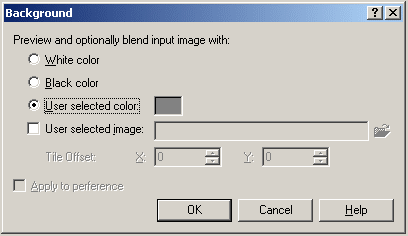
Figure 8: The SS PRO Background box.
can input an exact RGB value to have accurate previews. Although
the words "...and optionally blend input image with" sound
promising, this choice does not offer assistance in achieving smooth
transparency. In our example, we're going to choose the red to match
the background of the HTML table in figure 6.
Once you've chosen a background color that makes working with the
transparency tools easier, press Control+T
to enter the transparency settings and create a new mask as described
above. You'll notice this time that the effect is immediately apparent—a
single Alt+Click on the red will
make 99% of it disappear and we're left with an image ready for
export. In Figure 9 below, you'll
notice there is absolutely no halo effect—the transparency
is clean.
Click the above image to
see the enlarged version.
Figure 9: The transparent effect we were looking
for!
ABRA-CADABRA!
Learning how to make your images transparent can take a bit of
work, but once you have it mastered, your websites will take on
a more polished look. Transparent images can be combined with tables
to create some great page layouts, and drop shadows always give
a nice 3D look to a page. So fire up PhotoImpact and SmartSaver
Pro and make those backgrounds disappear!

(Page
1 - Page
2 - Page 3)
Back
to General Web Info
|