|
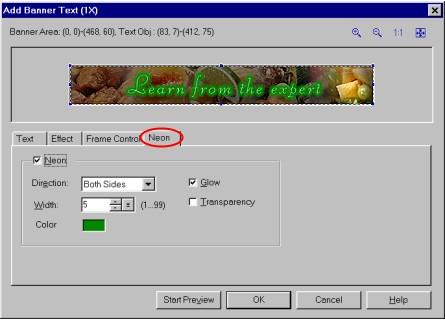
Support | Resource Center | PhotoImpact Pro Creating a Banner Advertisement (Part 1 - Part 2 - Part 3) 11. In the Neon tab, select the Neon option. Then specify its thickness and color. I selected Both Sides in the Direction box, entered a Width of 5, and set the neon Color to green. Select Glow to produce a glimmering effect.
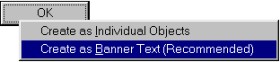
12. Click OK. When prompted to choose how you want the banner text inserted to your project, select Create as Banner Text. This adds the banner text to your animation as banner objects, allowing you to modify later by selecting Frame: Edit Banner Text. 13. Now you are ready to add our second set of text to the animation project. Repeat step 5 to select the frame marking the start of your new text - which is, in this tutorial, the very next frame after the end of the first banner text.
14. Follow steps 6 through 12, only this time use a different font and color. Also, select Merge Horizontally for Enter scene and Zoom-in (Rotate) for Exit scene. In the Neon tab, leave the Glow option cleared. 15. For the third and last set of text, you will use some simple black text against a white background with a thin green border on all sides.
To create a border, first click Add Frame
16. Now select Frame>Add Banner Text and type your text. In the Effect tab, select Drop for Enter scene and Fade for Exit scene. In the Frame Control tab, set the Delay time to 50 and the Key frame delay to 80. In the Neon tab, leave the Neon option cleared. When done, click OK and select Create as Banner Text. 17. Click the Preview tab on your workspace to view the entire animation project. 18. Select File>Save to save your animation project. Back to PhotoImpact Pro Tutorials
|