|
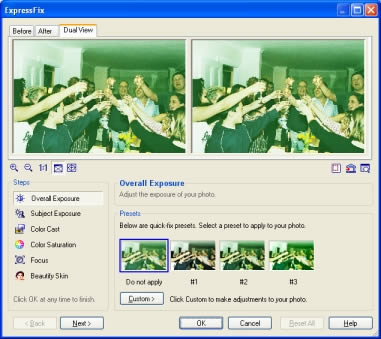
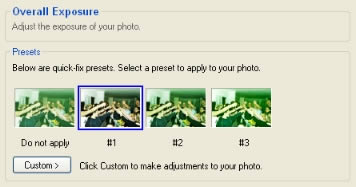
Support | Resource Center | PhotoImpact Pro Correcting Digital Photos with ExpressFix (Part 1 - Part 2 - Part 3) ExpressFix is a timesaving tool that provides quick fixes to common digital photo problems such as color cast, unbalanced exposure, out-of-focus conditions, and more. It provides one-click presets that instantly correct photographic flaws, as well as custom adjustments that give finer enhancements to photos. In this tutorial, two examples will be used to show the different correction tools in ExpressFix. The first example shows the use of a combination of tools to correct a group photo that is underexposed and has a greenish cast. The second example illustrates how to use the Beautify Skin feature to make instant facial retouches to a portrait photo.
To use ExpressFix, select Effect: Photographic: ExpressFix.
At the top of the dialog box, the view to the left indicates the image as it is prior to adjustment. The view to the right will display previews of adjustments as you apply them. As you proceed through the steps, the left view updates with the latest adjustments. Underneath, the panel to the left of the dialox box indicates the various tools that are presented as steps. It is necessary to follow the steps sequentially. If a previously adjusted step needs to be readjusted, you can click once again on that step while saving adjustments made later.
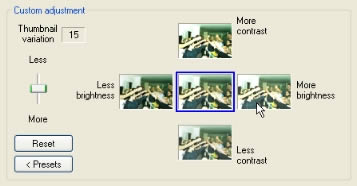
Then click Custom to fine tune adjustments. If your image is similarly dark, click the More brightness thumbnail. It may also be necessary to adjust contrast levels to balance out dark and light areas on the image. If adjustments are made without achieving quite the required result, click Reset to start again.
Back to PhotoImpact Pro Tutorials
|