|
Support | Resource Center | PhotoImpact Pro
Correcting Digital Photos with ExpressFix (Part
1 - Part 2 - Part
3)
Step Two:
Click Subject Exposure on the Steps list. To make finer adjustments, click
Custom. Then increase or decrease flash and backlight. This will allow
more details to be seen in the subject.

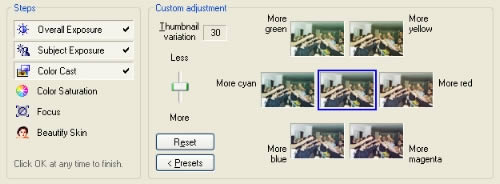
Step Three:
Click Color Cast on the Steps list. This step is to correct any overall
discoloration of the image by removing the color cast. It may not be immediately
apparent or obvious that there is a color cast on the image until the
thumbnails are viewed. Click Custom then click More magenta to counter
the greenish cast.
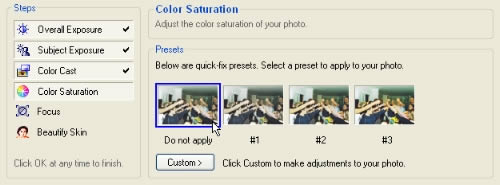
Step Four:
Click Color Saturation on the Steps list. This step imbues color on otherwise
dull ones or lightens overly bright colors. Since the colors in the image
were already brought out by removing the color cast in the previous step,
click Do not apply.
Step Five:
Click Focus on the Steps list. This step sharpens or blurs the image.
To soften the image a bit, click #2.

Step Six:
The final item on the Steps list, Beautify Skin, can be skipped for this
image.
Click OK to confirm applying all the enhancements. The image at the right
shows the final result.

(Part
1 - Part 2 - Part
3)
Back
to PhotoImpact Pro Tutorials
|