|
Support | Resource Center | PhotoImpact Pro
Correcting Digital Photos with ExpressFix (Part
1 - Part 2
- Part 3)
Example Two: Faces
For the second part, we will feature a different image with a person as
the subject. Open the ExpressFix dialog box again.

Step One:
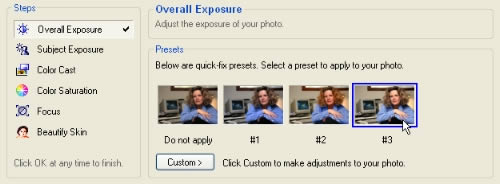
Again, the image is a little dark, so click preset #3 under the Overall
Exposure step.
Step Two:
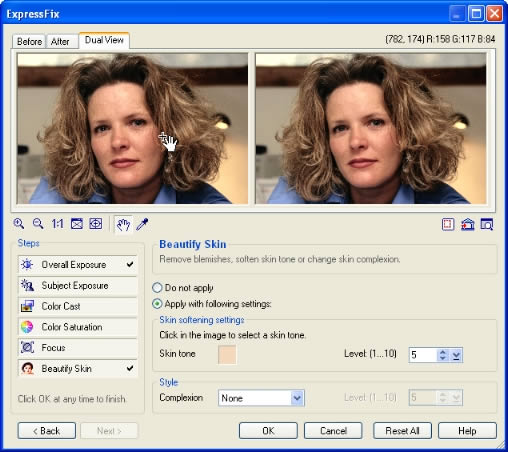
As this image is not affected by any other problems, skip the rest of
the steps and go directly to the final step, Beautify Skin.
Beautify Skin is a tool to smooth out uneven skin tone. To use this tool,
select Apply with following settings.
Step Three:
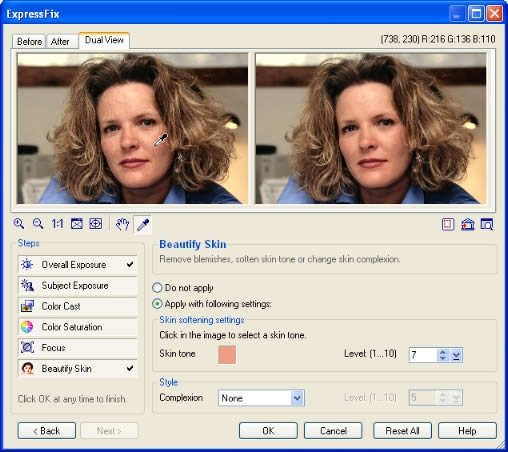
Click Zoom in repeatedly until you see a larger view of the subject’s
face. Click the Pan image button and drag the image to center it in the
middle of the preview window.
Step Four:
Click on the subject’s face in the left image to select a skin tone.
Select the intensity of the effect in Level. To clear and smoothen her
skin, the Level is set to 7.
Click OK.
(Part
1 - Part 2
- Part 3)
Back
to PhotoImpact Pro Tutorials
|