|
Support | Resource Center | PhotoImpact Pro
Producing Realistic Images with High Dynamic Range (Part
1 - Part 2 - Part 3
- Part 4)
| Bracketing
your shots
Most digital cameras have a feature called Automatic
Exposure Bracketing (AEB). AEB is used to take a series of
shots of the same scene in various exposure settings. Here are some
guidelines on how to use AEB for optimizing images and creating
a camera curve profile:
- Preferably, mount your camera on a rock-steady
tripod to minimize camera shake.
- Set the camera to the Aperture
Priority mode. In Aperture Priority mode, you will manually
identify the aperture opening and let the camera automatically
set the shutter settings. You can also set the camera in Manual
mode if you are confident with your photography skills and dislike
too much automation. Use a fixed aperture opening and assign varied
shutter settings. Take progressive shots with increasing or decreasing
exposure values.
- Turn on the Automatic
Exposure Bracketing feature of your camera.
- To produce a wide exposure difference among
your shots, take your shots with at least +/-
1.0 Exposure Value (EV). If your camera can only apply
less than +/- 1.0 EV, take more shots until you cover a wide range
of exposure.
Three shots can produce good results for producing
an optimized image. More shots may result in too much difference especially
if you cannot make the camera steady enough. On the other hand, if
you are creating and saving the camera curve profile, five or more
is the recommended number of shots. |
Applying HDR to Bracketed Images
High Dynamic Range is best applied on bracketed images. Bracketed images
refer to progressive shots of a similar scene taken in various exposure
settings. You can use your digital camera to perform automatic exposure
bracketing. For guidelines on how to bracket your shots, read the section
entitled “Bracketing Your Shots”.
Step One:
Open the images that were taken using various exposure settings. Use at
least three images like the sample photos in this tutorial.
Supposing you are behind the camera while taking these sample photos.
The vast dynamic range, the gap between the extreme brightness streaking
from the outdoors to the dark tones from inside the room, may confuse
the light metering sensors of your camera. The metering may show a balanced
value but the resulting photos reflect over and under tones in certain
portions. To produce a realistic photo, photographers traditionally use
a camera filter called graduated neutral density filter, which has to
be screwed on top of the camera lens. But with the High Dynamic Range
feature, you no longer need to buy that camera filter.
Step Two:
Select Format: High Dynamic Range.
Step Three:
Select Registration to allow the program
to fix the registration of the loaded pictures. This is particularly useful
for pictures taken without the aid of a tripod. However, it is highly
recommended that you use a tripod to minimize camera shake. Select Auto
crop after registration to merge images and automatically remove
excess spaces. Click Preview to see
the superimposed image in the Preview Pane.
This image is merely a preview for you to check the registration and is
not a preview of the HDR image.

 Note:
You will be prompted to remove images with identical exposure settings.
In the Image List Panel, select one of the identical thumbnail images
then click to remove it. Note:
You will be prompted to remove images with identical exposure settings.
In the Image List Panel, select one of the identical thumbnail images
then click to remove it.
Step Four:
Select Auto Generate from the Camera
curve profile to create an accurate camera response curve based
on this set of images.
Step Five:
Click Compose to create the HDR image.
This takes you to the Optimization tab
where the HDR image is shown in the Preview
Pane.

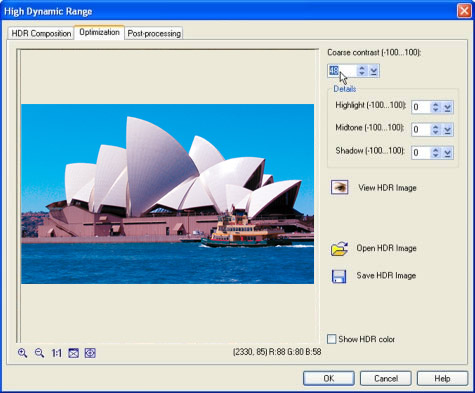
Step Six:
You can adjust the Coarse contrast setting
from -100 to 100. But for the composite image in this tutorial, applying
a value of 48 results in a more realistic
image. The coarse contrast value determines the overall contrast setting.
Details, on the other hand, allows you
to make individual Highlight, Midtone
or Shadow adjustments to bring out finer
details in the light, midtone, or dark areas in the image.
Step Seven: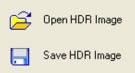
Click Save HDR Image to save the HDR
image for future use. This opens the Save As
dialog box which allows you to save the image in a destination folder
in the .HDR format. Should you need to access this saved HDR file in the
future, click Open HDR Image to browse
for the image.
(Part
1 - Part 2 - Part 3
- Part 4)
Back
to PhotoImpact Pro Tutorials
|


